![]() Reference
Reference
![]() File->Options...
File->Options...
All settings you make in the following dialogs are stored to the registry.
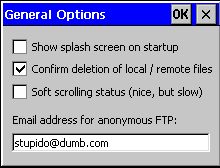
Use this dialog to set some general options:
"Show splash screen on startup". After a while this can be annoying so you can switch it off. Default: On.
"Confirm deletion of local / remote files". You can't undo this so perhaps you should leave it checked. Default: On.
"Soft scrolling status". Looks very nice but requires a fast device. Default: Off.
"Email address for anonymous FTP": Might be your email address or something like guest@nobody. Default: See the screenshot.
Use this dialog to change the settings for your connection. CCTransfer can check the server periodically (every 60 seconds) by means of a SYST request. Some servers timeout if there is no data transfer for a certain period of time; detecting this will allow CCTransfer to gracefully shutdown the connection.
Some servers send multiline welcome messages which are difficult to read in the log pane of our small devices. If you wish you can omit these messages.
The standard FTP port is 21. You will usually not have to change this.
If you connect to the FTP server through a dial-up connection you can specify here which one to use for this purpose. Note: The list of available connections will most likely look different on your device.
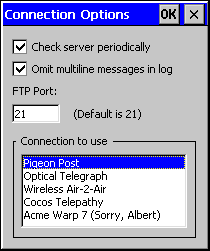
Default for "Check Server": Checked.
Default for "Omit multiline": Checked.
Default for "FTP Port": 21.
Use this dialog to manage the FTP servers you are about to use:
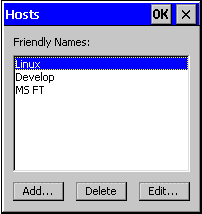
Press the Delete button to delete the selected host. Press Add... or Edit... to add a new entry or to edit an existing entry, respectively:
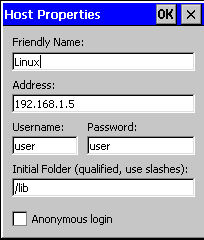
Each host entry is made up of
Friendly name for easy handling.
The Internet address, either in readable form, e.g. "ftp.acme.com" or as an IP address (see the screenshot).
Your username and password, if any.
The initial folder to which CCTransfer will CWD upon successful connection. May be empty.
If you tick Anonymous login, CCTransfer will automatically fill in the fields for username and password.
Use this dialog to change your settings for ROM Transfer. Select the base address of the address area to transfer. Use the "Left" and "Right" buttons to shift the address by 4 bits to the left or right.
Select the address range to be transferred. Use the "Left" and "Right" buttons to add or subtract 0x10000 bytes (= 65,536 decimal) to and from the range.
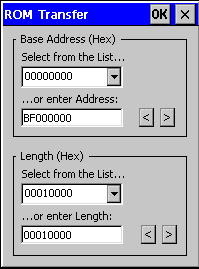
Default for "Address": 0xBF000000 (Most ROM's start here.).
Default for "Range": 0x00100000 (1 Megabyte).
See the Quick Start section for more information.
Use View->Menu Bar to toggle the menu bar. This can give you valuable extra screen space.
Use View->Tool Bar to toggle the tool bar. This can give you valuable extra screen space.
Use View->Tool Bar left to move the tool bar to the left side of your screen.
Use
View->Refresh
to update the display of the local or remote directory. This is done
automatically after downloads, uploads, deletion and renaming of files.
Use FTP->Transfer->ASCII to switch to ASCII transfer.
Use FTP->Transfer->Binary to switch to binary transfer.
| Brings up a dialog in which to select the host you want to connect to. Pressing the button again will disconnect. | |
| Upload the selected file. | |
| Cancel the upload or download in progress. | |
| Download the selected file. | |
| Switch to Local pane. | |
| Switch to Remote pane. | |
| Switch to Log pane. | |
| Toggle menu bar on /off. | |
| Exit application. |
(c) 1999, Cocos Development Ltd. All rights reserved. Products and company names herein may be the trademarks of their respective owners.